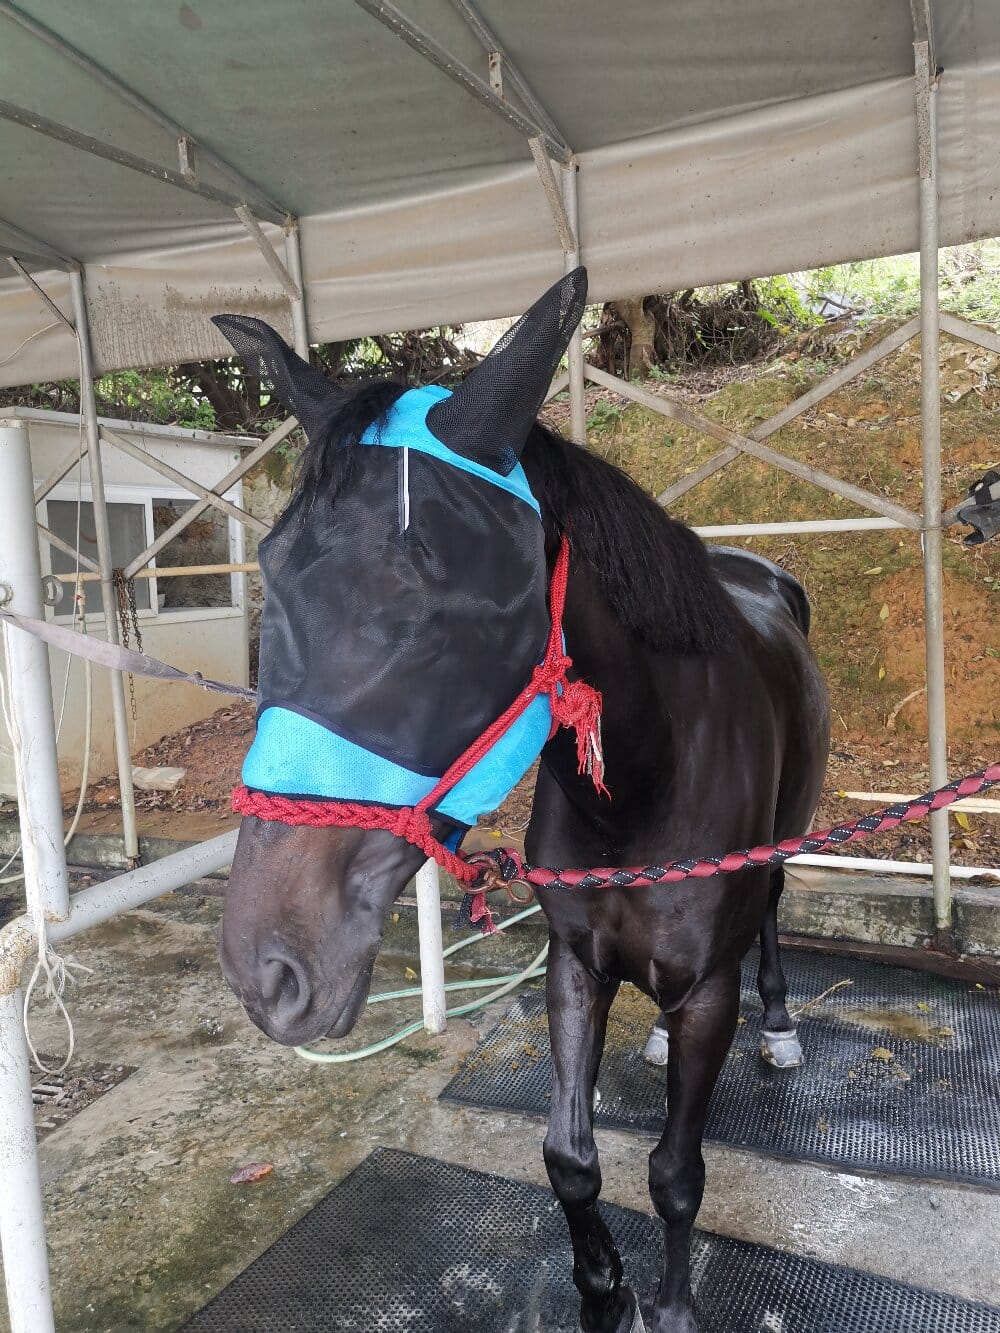

I have spent the last three summers watching my gelding toss his head, stomp, and rub his face raw against the fence, and I finally decided to treat fly season like a proper experiment rather than a guessing game. A horse fly mask seemed like such a simple purchase, yet the results varied wildly between brands, and I wanted to understand why. So I approached the problem methodically: observe the behavior, form a hypothesis, test a variable, and record the outcome. What follows is the practical methodology I now use whenever I evaluate a new fly mask for my horses.
Step One: Defining the Actual Problem Before Buying a Horse Fly Mask
My first mistake was shopping before diagnosing. I assumed every head-shaking episode meant flies, but observation proved otherwise. Over two weeks I logged when my horse showed irritation: morning turnout, afternoon riding, and dusk. The pattern pointed to face flies and small gnats near the eyes and ears rather than biting stable flies on the body. That distinction matters because it determines mesh density, coverage area, and whether ear protection is essential. Before you compare products, spend a few days noting timing, weather, and which part of the face your horse targets. A mask that solves the wrong problem is money wasted.
Step Two: Setting Measurable Criteria for Evaluation
Once I knew the problem, I built a simple scoring sheet. Every candidate mask gets rated against the same fixed criteria so my impressions stay honest rather than emotional:
- Fit and stability: Does it stay in place during turnout, rolling, and head rubbing?
- Visibility: Can the horse see clearly enough to eat, drink, and move confidently?
- Ventilation: Does air move through the fabric, or does heat build up?
- Durability: How do seams, binding, and fasteners hold up after two weeks of daily wear?
- Skin tolerance: Any rub marks, hair loss, or irritation around the edges and ears?
I score each item from one to five and photograph the mask on day one, day seven, and day fourteen. Written notes beat memory every time, especially when you are rotating several masks through a small herd.
Step Three: Controlled Testing and Rotation
The temptation is to leave a new mask on for a full day and call it a success if the horse still has it on at evening feed. That is not a valid test. My method is gradual exposure: two hours on the first day, half a day next, then full turnout. I watch for the first ten minutes because most fit failures appear immediately, usually as slipping over the eyes or twisting at the poll. I also rotate masks between horses of similar size to separate design flaws from individual fit issues. If the same brand rubs two different horses in the same spot, that is a design problem, not a coincidence.
Step Four: Seasonal Maintenance and Reassessment
Methodology does not end at purchase. I inspect each mask weekly, checking the binding for fraying and the mesh for holes that let tiny gnats through. I hand-wash in cool water and air-dry out of direct sun, because heat warps the shape and weakens elastic. I also reassess mid-season: a mask that worked in June may trap too much heat in August, so lighter coverage or a second option may serve better. Recording what worked across seasons has saved me from repeat purchases that failed the same way twice.
Conclusion
Treating fly protection as a structured process rather than a one-off purchase has made a real difference for my horses and my budget. Define the problem, score candidates against consistent criteria, test gradually, and reassess through the season. That discipline turns a frustrating annual chore into a repeatable routine with fewer wasted dollars and calmer, more comfortable horses.